CASCADA PIMPmyCASCADA

TUTORIALS

Change automatic gear knob

Schaltknauf Automatikgetriebe
© PIMPmyCASCCADA 2021
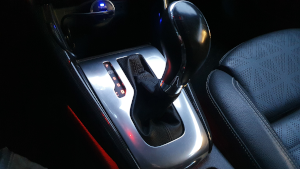
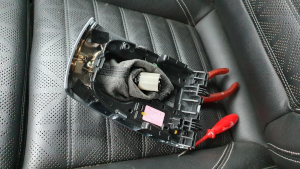
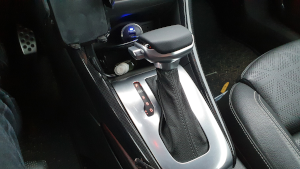
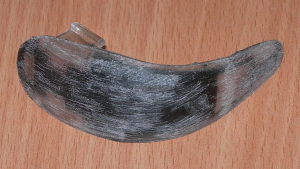
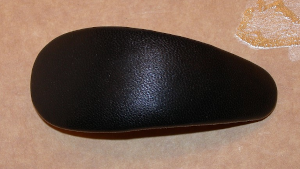
The built-in gear knob wears out quickly and no longer looks so nice. 
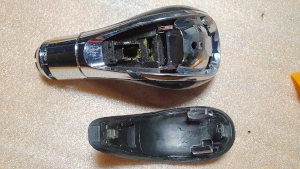
It is not available separately. Only the insert is available separately.

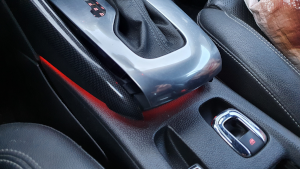
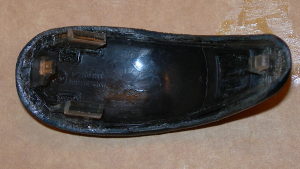
GM part number 95514707

Accessory automatic gear knob are available in different versions.
Schaltknauf Automatikgetriebe
© PIMPmyCASCCADA 2021

Schaltknauf Automatikgetriebe
© PIMPmyCASCCADA 2021
Move the selector lever to position D, switch on the ignition and apply the brake. 
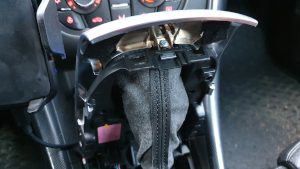
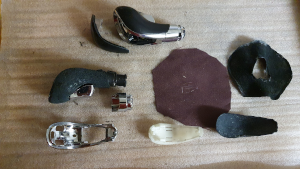
Reach under the cover from the front and pull it upwards. 
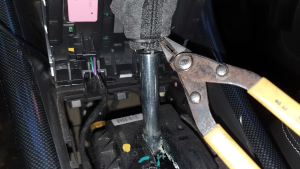
Unhook the cover at the rear of the storage compartment and pull it all the way up over the gear knob until the cable tie is visible.
Schaltknauf Automatikgetriebe
© PIMPmyCASCCADA 2021

Schaltknauf Automatikgetriebe
© PIMPmyCASCCADA 2021
Carefully cut through the cable ties and remove them (do not damage the gearshift bag). 
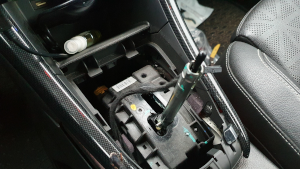
Push the cover and gearshift bag all the way down. With a little force, the selector lever can now be pulled off. 
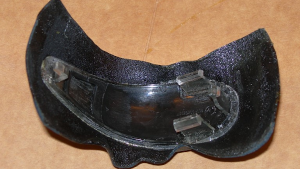
When the plug for the lighting has been disconnected, the cover can be removed completely.
Schaltknauf Automatikgetriebe
© PIMPmyCASCCADA 2021
Schaltknauf Automatikgetriebe
© PIMPmyCASCCADA 2021
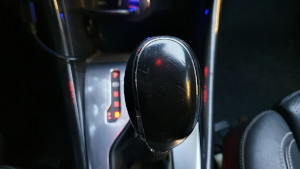
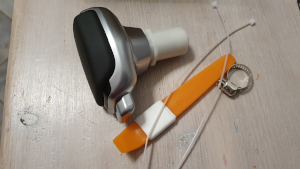
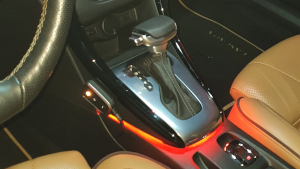
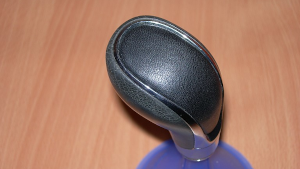
Here is an oldschool gear lever ordered via Ali-Express. The fit is good. Nothing wobbles. The assembly is done in reverse order. Put the cable tie together beforehand and tighten it to about 4 cm. Pull the gearshift bag down over the selector lever as far as possible and fix it lightly in the groove (arrow) with the cable tie.
Schaltknauf Automatikgetriebe
© PIMPmyCASCCADA 2021
Schaltknauf Automatikgetriebe
© PIMPmyCASCCADA 2021
The eyelet of the cable tie should point forwards towards the storage compartment, otherwise it will be noticeably pressed through later. After the seam of the gearshift bag is aligned in the middle, the cable tie can be pulled tight and the protruding end cut off. Place the cover and the selector lever over the gearshift gate, put on the gearshift knob and press it down, hook the cover in at the front and press it down at the back until it snaps back into place.
Schaltknauf Automatikgetriebe
© PIMPmyCASCCADA 2021
Oldschool gear lever
suitable for Chevrolet Onix, Buick Regal, Excelle GL8, Opel, Vauxhall ...

AliExpress

Schaltknauf Automatikgetriebe
© Sascha 2021
Oldschool gear lever perforated
suitable for Chevrolet Onix, Buick Regal, Excelle GL8, Opel, Vauxhall ...

AliExpress
Schaltknauf Automatikgetriebe
© Sascha 2021

Refer automatic gear knob

Schaltknauf neu beziehen
© PIMPmyCASCCADA 2021
Refer automatic gear knob

Thanks to Maschi

Use a car disassembly tool to lever the insert upwards (if necessary in the car).
Schaltknauf neu beziehen
© PIMPmyCASCCADA 2021

Schaltknauf neu beziehen
© Maschi 2021
Remove coating with knife and chisel. (A lot of work!!)
Pfeil links
Remove remnants with sandpaper
Pfeil rechts
Schaltknauf neu beziehen
© Maschi 2021

Schaltknauf neu beziehen
© Maschi 2021
Leather - max. thickness 1.2 mm - e.g. from car upholsterer. Apply glue (e.g. Pattex) evenly. Allow to dry for 20 minutes.
Pfeil links
Apply leather to the narrower end of the plastic part and hold it, then apply it to the rest under tension. Heat with a hair dryer if necessary.
Pfeil rechts
Schaltknauf neu beziehen
© Maschi 2021

Schaltknauf neu beziehen
© Maschi 2021
Press on evenly.
Pfeil links
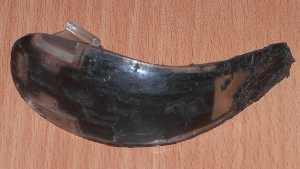
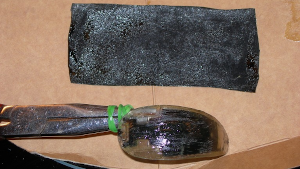
Cut off the overhanging leather with 2 mm overlap to the plastic edge. At the lower edge - in the picture on the right - rather with only 1 mm. Apply glue to the plastic edge and the leather overhang with a small bristle brush and leave to dry for 20 minutes. Then press the leather around the edges.
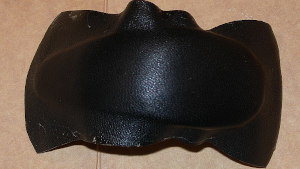
Pfeil rechts
Schaltknauf neu beziehen
© Maschi 2021

Schaltknauf neu beziehen
© Maschi 2021
Ready covered.
Pfeil links
Reassembled. First insert the upper tabs halfway, then the nose of the narrow side at the bottom, then press everything together until it locks into place.
Pfeil rechts
Schaltknauf neu beziehen
© Maschi 2021

Schaltknauf neu beziehen
© PIMPmyCASCCADA 2021
Original and aftermarket selector levers disassembled and prepared for fitting.

© PIMPmyCASCADA last update 2021-02-07